
Other Work Page
Rocket Pack
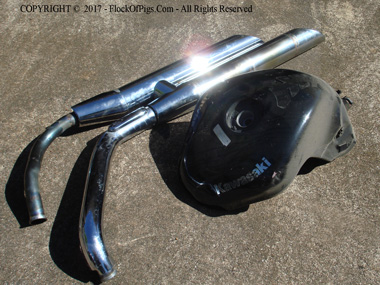
Starting materials
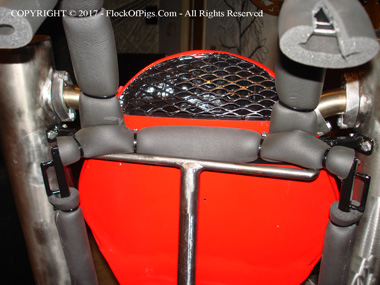
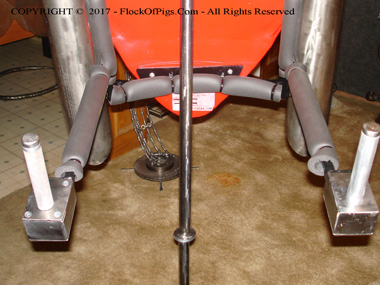
Air Intake
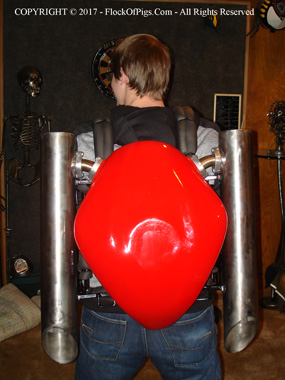
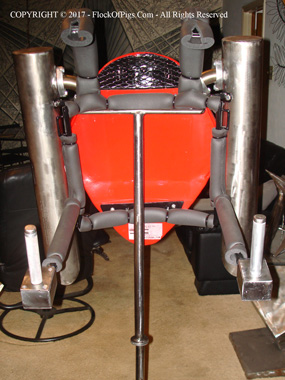
Front view on display stand

Parts layout before assembly
Hand grips and controls
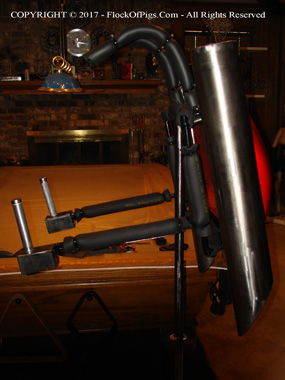
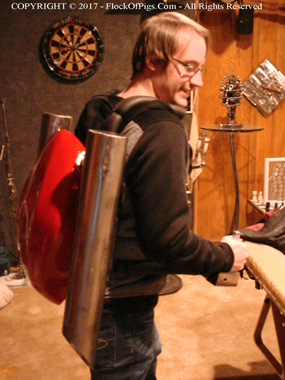
Side view on display stand
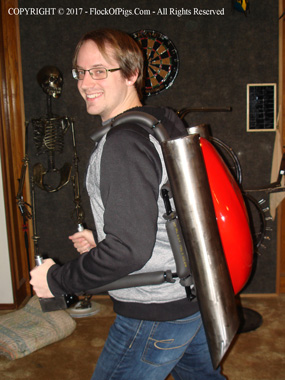
Rocket pack and custom display stand. Rocket pack primarly made from recycled motorcycle exhaust pipes and fuel tank. Rocket pack weighs approximately 40 lbs. Belts and straps not shown.
Custom Solar Panel Mount
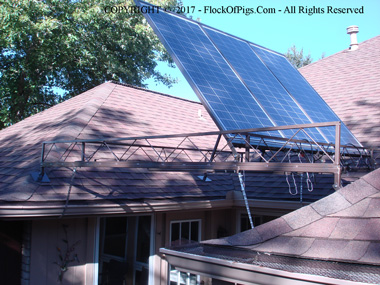
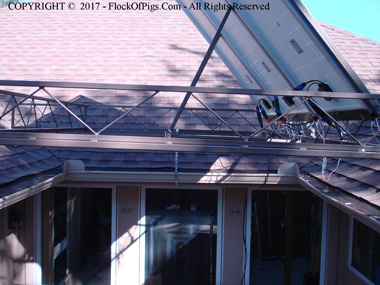


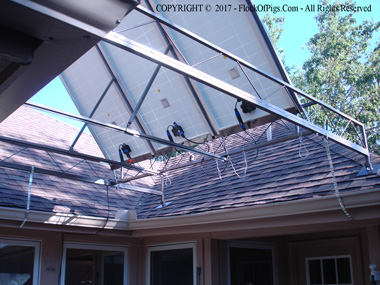
This is a custom built solar panel mounting. The mount spans 10' over a small patio area and is NOT affixed to the roof itself (it only rests on the roof). It has 4 (6"x6") steel pads which help distribute the weight evenly over the shingles without damaging them. It is held in place with steel strapping which is screwed to the underside of the roof eve. There are 2 slide bars which allow for adjusting the angle of the panels from 0-75 degrees. When laying flat, the panels can be easily removed from the underside of the mount for cleaning or threat of hail.
Firewood Cart
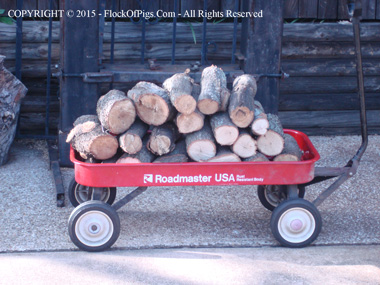
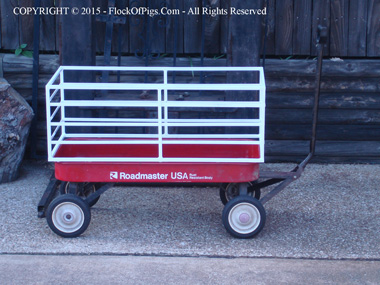
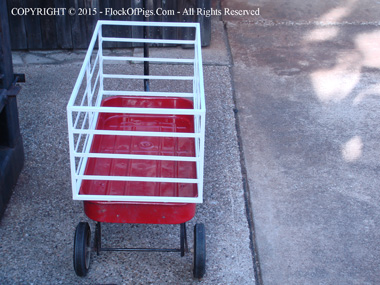
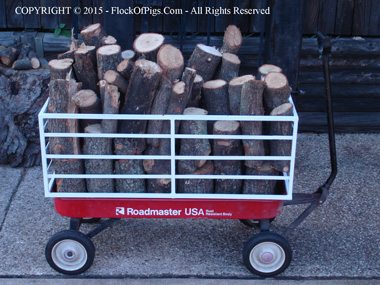
No More Falling Off The Wagon !
I have used my son's old wagon for hauling firewood onto the back patio for many years now. However, the firewood was constantly falling off the wagon as I pulled it across the cobble stone walk way in my back yard. This light weight add-on cargo box is attached to the top rim of the wagon with a few screws and securely holds all the cargo inside the wagon.
Dual Purpose Jetski Trailer.
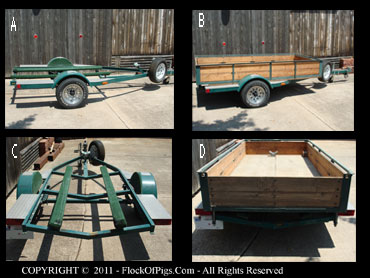
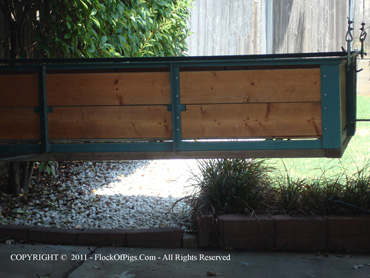
Jetski trailer without and with cargo box mounted.
Front and rear box mounts and box internal tie down.
Before I got my truck, I used to tow my jetski with a little Nisson Altima. Towing the jetski was no problem, but hauling anything large usually was a problem. I thought about getting another cargo trailer but I really didn't have the space to store another trailer. That's when I realized that I could just build a cargo box to mount on my existing trailer. I was already keeping the jetski on a rolling show room stand in the garage and I was keeping the trailer outside in a covered car port.
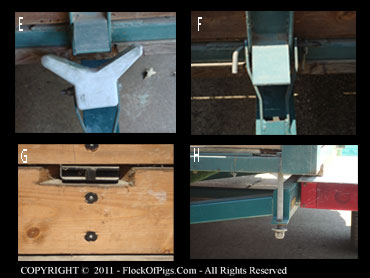
I designed a cargo box (photo B and D) that utilizes a simple 3-point mounting system. I remove the rubber boat bumper (photo E) and use a slide bolt and cotter pin to connect the front of the cargo box to the trailer (photo F). I use (2) large bolts with nylon lock nuts to connect the rear of the box to the trailer using the trailer tie-down brackets (photo H).
The box has inside measurements of 50 x 102 inches which allows me to carry full sheets of plywood or whatever. I used 1/2 inch plywood for the box floor and 1 x 6 inch planking for the sides and trailgate. There are (10) internal tie down anchors inside the box (photo G). I screwed 2 x 3 inch cedar fence rails to the bottom of the box so it clears the jetski runners on the trailer and keeps the trailer frame from getting all scratched up.
The base frame of the box was made using 1.5 inch square steel tubing. The frame is a basic square frame with a runner down the center for added floor support. I welded 1 x 1/8 inch strapping across the frame every 2 feet to support the plywood flooring. I drilled holes in the strapping and welded nuts in place on the underside so I could bolt the plywood flooring to the frame using pan head bolts. The side and top rails are 1 x 1/4 inch angle iron welded to the base frame.
The box is very sturdy but it weighs about 160 lbs. If I were to do it again, I would probably use light weight 3/4 and 1/2 inch square steel tubing instead of the heavy angle iron. Fortunately, I also built a single hand crank lift in my car port so I can easily raise the box off of the trailer when I go jetsking and lower it back onto the trailer when I need to haul something. It takes me about 10 minutes to convert the trailer.
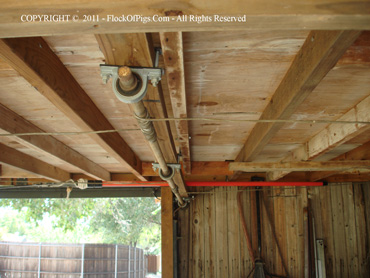
Trailer Box Lift
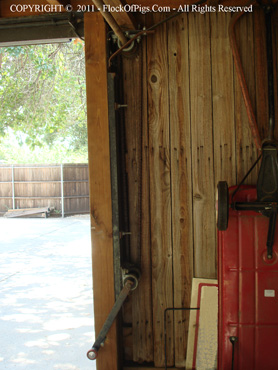
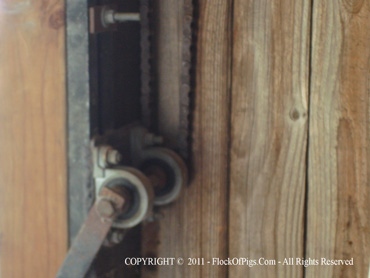
This is the trailer box lift which I use to add or remove the cargo box from my jetski trailer. It uses a hand crank with a chain drive to the cable winding rod at the top. I used a small sproket at the hand crank and larger sproket at the top. It only takes about 3-4 cranks to raise the box off of the trailer. I use a bolt stuck in a drilled hole (photo E) to 'park' the box lift in a suspended mode. Photo (A) shows the cargo box suspended when I'm using the trailer to haul the jetski. Photo (B) shows the 1" diameter cable winding shaft mounted using 3 bearings bolted to a 2x4. Photo (C) shows the large sproket and chain drive for the cable wind up shaft. Photo (D) shows the lower end of the chain drive with the hand crank which is mounted using 2 smaller bearings. Photo (E) shows the full hand crank assembly and chain drive. Photo (F) shows 1 of the 4 suspended cable pulleys. Photo (G) shows 1 of the front cable mounts on the cargo box.
A) Trailer box with jetski trailer in use.
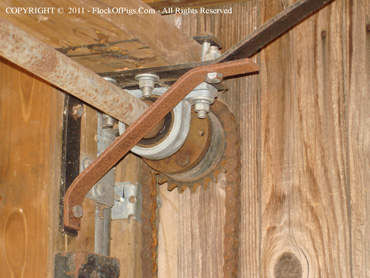
C) Upper winding shaft with larger diameter chain sproket.
E) Hand crank and chain drive system.
B) Cable winding shaft and mounting.
D) The lower crank with small diameter chain sproket.
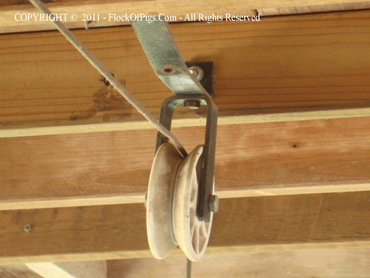
F) The pulley system.
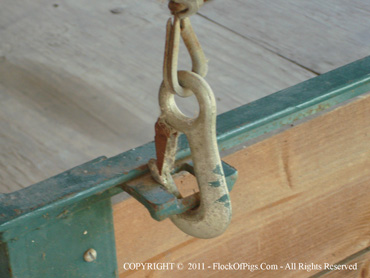
G) The front cargo box hook.
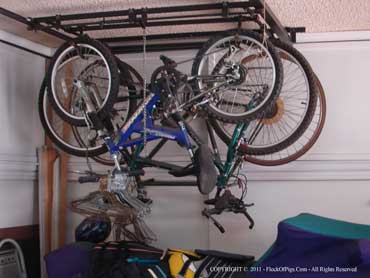
Track Mounted - Sliding Bike Rack
I have a typical 2 car garage and a ton of stuff. In order to get everything in my garage and still have room left to work, I needed to maximize storage space. I built 2 foot deep cabinets along the back and 1 side wall of my garage (for the stuff). Everything is hidden from view using overhead track and light weight sliding panels for the top cabinets (made with MDF frames and 3/16 inch masonite) and 3/4 inch plywood panels on the lower cabinets.
I designed the bike rack above, which also uses a track system, so I can easily move the bikes away from the cabinets to gain access. There is a small pull chain connected to a lever system which automatically locks the rack in place (via a coiled spring) when the chain is released. Pull the chain and slide the rack forward/backward, release the chain and the rack locks in place. This locking mechanism may seem unnecessary until you try to hang or remove a bike from a rack that keeps moving around.
As you can see from the photo on the upper left, the bike rack is mounted directly over my jetski for maximum use of space. The jetski is stored on a showroom rolling rack so it too can be easily moved to allow access to the lower cabinets at the back and on the side. If possible, I put EVERYTHING that sits on the floor on wheels so I can move things out of the way or temporarily roll them outside if I need more work space.
The bike track rails are actually old bed rails. The rolling bike frame uses (4) guide rollers (white plastic) and (4) weight bearing rollers (black rubber) salvaged from old casters, for a very smooth operation. The ceiling mounts (angle iron) were positioned to distribute the weight load evenly across several ceiling joists. Project completed in about 3-4 days.
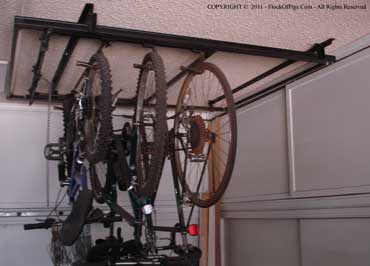
My bike rack also serves as a drying rack for wet ski vests and water shoes.

The locking mechanism
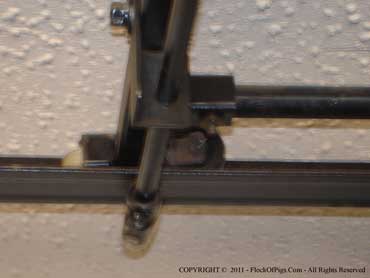
The roller system
Forced-Air Heat Exchanger for Fireplace
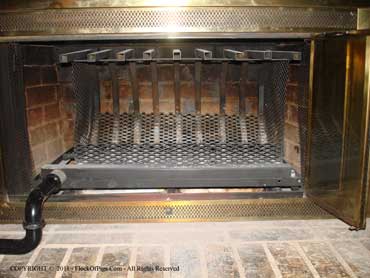
I designed and built this forced air heat exchanger for my fireplace. It uses an exhaust fan salvaged from an old gas HVAC unit (I know a guy with a HVAC service company). I made a small enclosure for the fan using sheet metal from salvaged pc cases. A flexible plastic hose connects from the blower to one end the 2 pieces of (new) metal sink drain pipe shown above (lower left). The sink drain pipe unscrews from the exchanger (photo on right) so I can slide the exchanger inside the fire place and close the doors when not in use.
I welded small sized diamond mesh on top of the 3/4 inch heating tubes (small size keeps the coals from falling through) and on the sides as well as a small piece in front to keep logs from rolling out. The (9) heating tubes are welded to the 1 1/4 inch square tube manifold. I predrilled 3/4 inch holes in the back side of the manifold before welding the heating tubes. A spray coat of hi-temp engine paint completed the job.
It's important that the heating tubes extend out several inches past the fireplace opening at the top so that the fast moving air coming out of the tubes doesn't pull carbon monixide into the room !
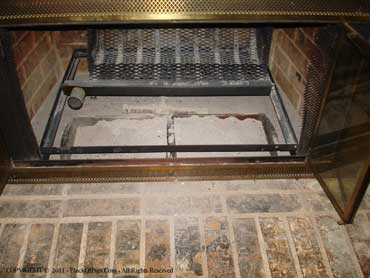
I built an angle iron rack that fits inside the fireplace that the heat exchanger slides in and out on. The rack also allows enough clearence for the exchanger to clear the gas ligher protruding from the fireplace floor and leave the gas lighter still usable. I use (2) steel cake pans under the exchanger to catch all the ash which makes cleaning alot easier. I have been able to reduce my winter gas bill significantly the last 2 winters and still stay toasty.
During the summer I try to keep an eye out for trucks trimming trees for the power company. If you ask them nicely for the wood, they will often cut the trimmed branches to whatever length you like and even help you load it in your truck or trunk. By the time cold weather rolls around, the wood has had enough time to dry out and be usable.
I'm currently looking for a 12v DC squirrel cage fan, with a high cfm output, that I can hook up to a car battery to use in the event of a winter power outage.
At the start of every winter, I pull the exhanger out and pressure test it using a soap and water solution for any rust or fatigue leaks and make any necessary repairs before using it again.
Portable Flag Pole Holder
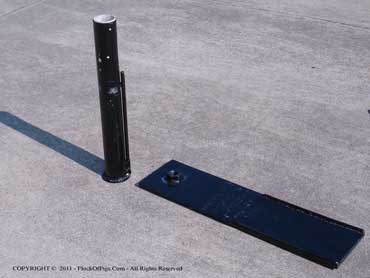
2-piece flag pole holder.
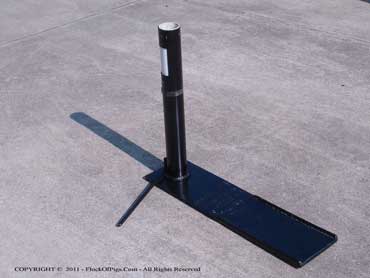
Mast screwed to base and tightened using lever.
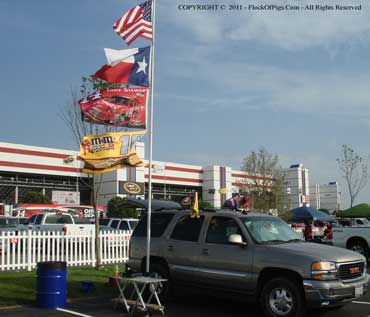
Tail gating at Texas Motor Speedway.
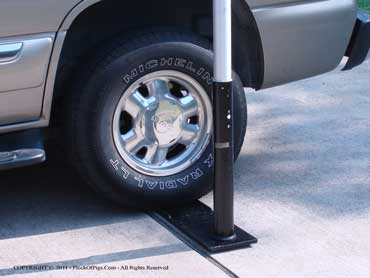
Base held down by weight of vehicle.
This is a custom built portable flag pole holder for a 25 foot telescoping flag pole (bottom photo). The short mast was recycled from an old propane grill. The base was made of recycled 1/4 inch steel plate which was welded to a 3/4 inch square tube frame. A large (1.25 inch) bolt was welded to a large heavy washer, which was then welded inside the bottom of the mast. A larger heavy washer was welded to the bottom of the mast. A large matching 1.25 inch nut was welded to the base plate.
20 x 1/2 inch pieces of rebar were welded to the top edges of the base plate for additional stability and to allow the driver to feel when the tire was centered on the plate.
The mast is screwed to the base plate and then tightened using an 15 inch piece of rebar as a lever. Two short pieces of 3/4 inch pipe were welded to the base of the mast in the shape of an upside down 'T'. The horizontal piece is used to hold the piece of rebar when connecting / disconnecting the mast to the base and the vertical piece is used for storing the rebar lever when not in use.
A piece of thin wall pvc was used as a sleave inside the mast to make a tight fit around the actual flag pole and prevent any noise or rocking of the flag pole.
The day the photo of the pole was taken at Texas Motor Speedway it was very windy with wind gusts over 40 mph.
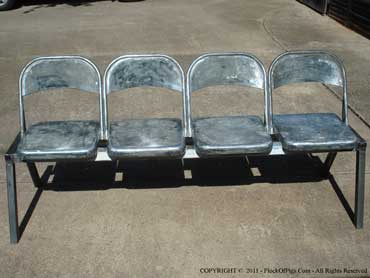
Original 1969 Talladega Raceway Seats
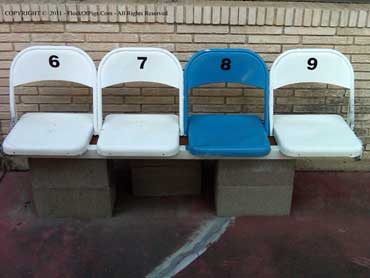
Seats in original condition.
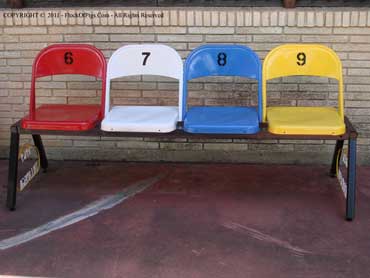
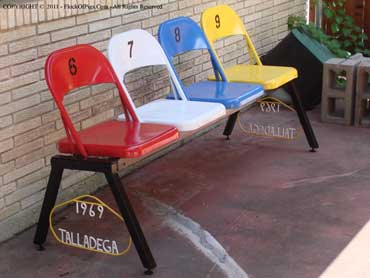
Finished Seats
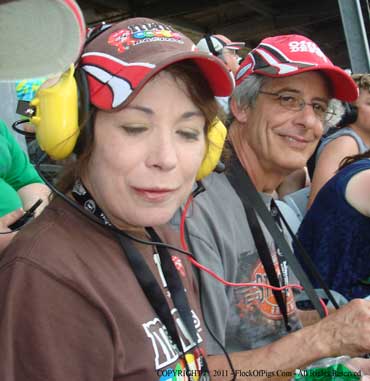
Lea Ann & Joe at Texas Motor Speedway (2011).
Seats are stripped and ready for primer and paint.
Leg details created using 1/4 inch steel rod.
These seats belong to my good friends Joe and Lea Ann. The seats were part of the original 1969 seating at Talladega Raceway before they were replaced.
They purchased them and brought them back to Texas. They were pretty beat up and had about 8 or 9 coats of paint on them, but I agreed to see what I could do with them. I stripped all the paint off using a torch and putty knife. Then I pounded out the dents and added the removable legs and the custom detail in the shape of the Talladega race track on the sides. Finally, I repainted them using the track seating colors and repainted the original numbers on them.
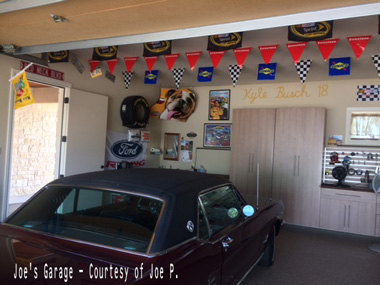
Lighted Nascar Sign
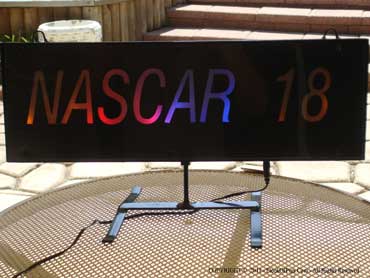
I created this sign as a birthday gift for Lea Ann since she is such a huge fan of #18 driver, Kyle Busch. The sign was designed to hang on the wall or use an optional stand.
It is back lighted using (8) super bright LED's (yellow, red and blue) which are wired to use a 12v DC power supply. It can be powered by an external 12 volt DC power supply when at home or by an auto cigarette lighter adapter when tail gating at the races. It uses only 1 to 2 watts of power and makes a great night light.
The sign construction is almost identical to the Inedible Pizza Factory - Pizza Sign on the More_Art page. The pizza sign used foil tape to seperate the light from the colored LED's and create distinct color words. This sign lets the colors blend to create a different effect. Different color LED's vary in brightness. Getting the desired color blend effect takes trial and error.
Nascar Drivers

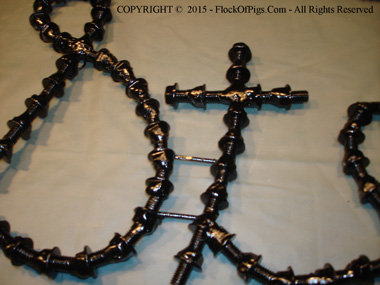
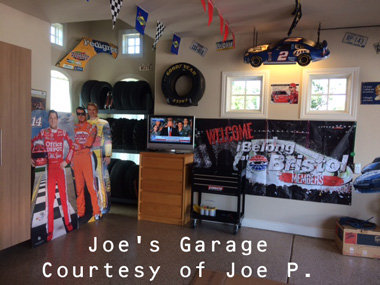

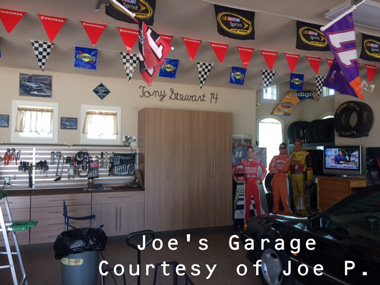
These wall hangings were created as birthday gifts for my friends Joe and Lea Ann who are big Nascar fans. Each full name and driver number required 300 small 1" long bolts. The letters are based upon a 9" x 5" font size. Each piece has 2 hangers on the back for easy mounting, inside or outside. The pieces are 9" tall (except for the ones with lower case 'y') and the longest is 33".
Unique Gifts
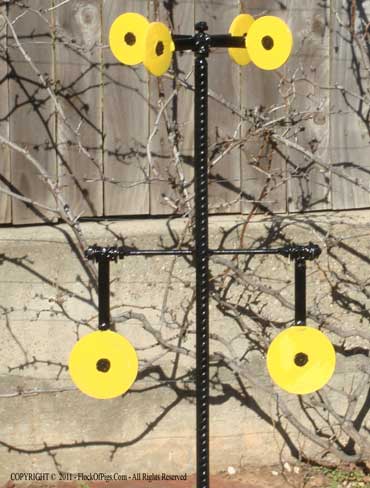
(Left photo) pellet, BB or 22cal gun target made from rebar, small metal rods and large washers. This has a 2 prong base so it does not turn and can be pushed into the ground using a foot.
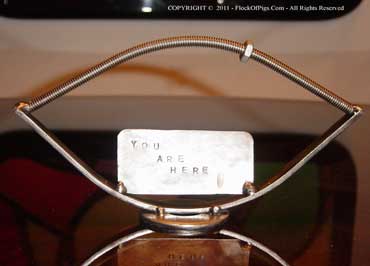
Caption reads: You Are Here...
Birthday gag gift (adjustable for any age) ... are you over the hill yet? Made using 1/4 inch nut/threaded rod, sheet metal, 1/2 inch flat steel and large washer. A metal die stamp set was used to do the lettering.
Unique Holder for Humming Bird Feeders
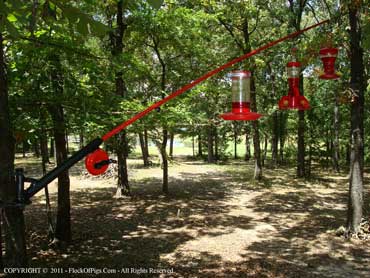
A friend of mine came to me with a rough idea for a holder for his wife's humming bird feeders at their Lake Fork cabin. Some rebar, angle iron, some old chain, a couple pieces of pipe, a couple of nuts and bolts, a large washer, (2) worn out steel wire cup brushes welded together (the reel) and a couple of pieces of scrap metal and presto ... one unique hanger for humming bird feeders.
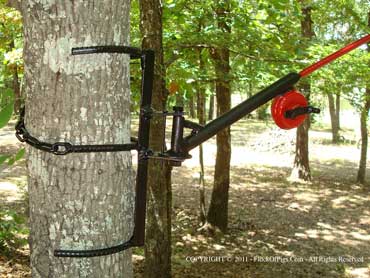
Nuts are used for the eyelets, rebar for the rod and pipe for the handle. The hanger actually swivels over to their deck so she can reach it to refill the feeders. The nail passes through both of the mounting supports and through holes drilled in the washer welded to bottom of the turning shaft, locking the shaft in place. Remove the nail and it swivels to another position where it can be locked again.
Garage - Custom Mounted Work Fan
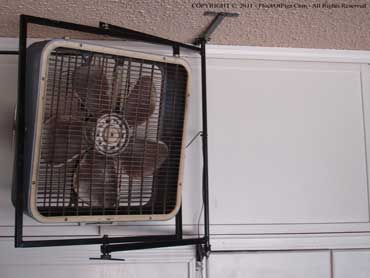
I needed a fan in my garage where I do all my metal work. I use to set this cheap box fan on top of boxes, carts or whatever, but it kept falling over and often was hard to aim where I needed the air flow. I designed and built this fairly simple, wall/ceiling mounted fan frame to do the job right. It swivels from side to side (so I can still have full access to the cabinets behind), and can be positioned and locked in any direction. When not in use, the fan hangs flat against the cabinets behind. It is mounted high enough so it clears the large drawers just below (right hand photo) and doesn't interfere with my truck when it's in the garage.
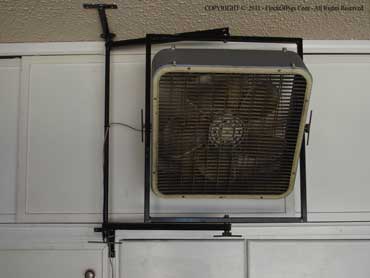
A square tube frame holds the fan and is mounted to a swivel frame (angle iron). There are large handle tightening bolts (1/4 inch rod welded to bolt heads) so I can work them easily without tools or removing my welding gloves. These bolts are used on the sides of the fan frame, bottom of the fan frame and the wall swivel shaft so I can lock the fan in any position. There were factory knock-outs already on the sides of the fan. I welded nuts to the inside of the fan case. The fan is mounted upside down since the fan controls are on the top.