
Furniture Page
Kawasaki Counter Stools
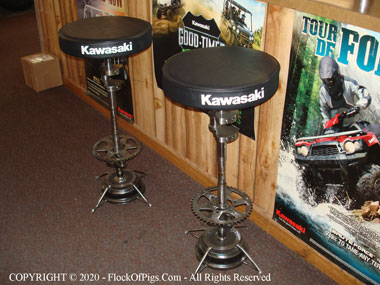
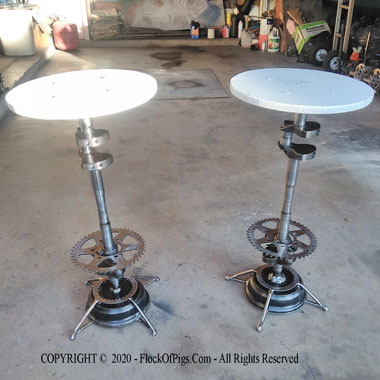
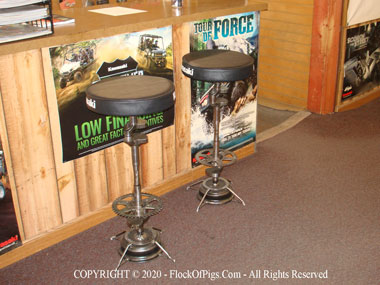
These bar stools stand 31" tall and weigh about 52 pounds each. I used a brake drum from a Kawasaki Mule for the base on both. The bases are slightly different but otherwise the stools are identical in construction. I used 2 crank shafts (from Kawasaki Mules and ATVs) welded together for the pedestal and a motor cycle sprocket for the foot rest. The seat cushions were done by a professional.
Spring Patio Chair
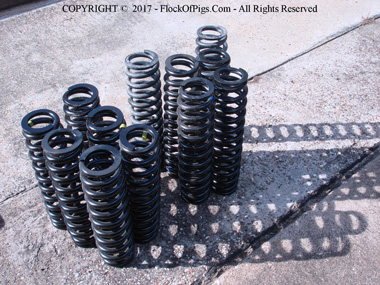
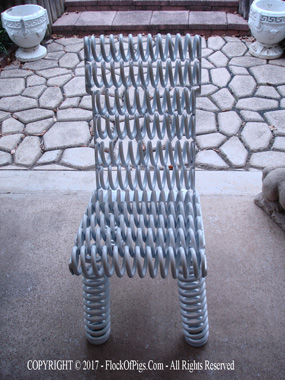
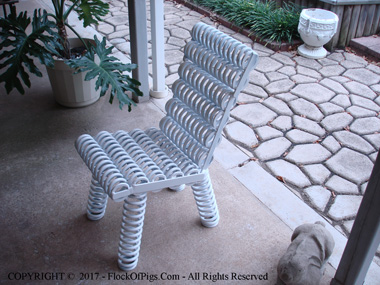
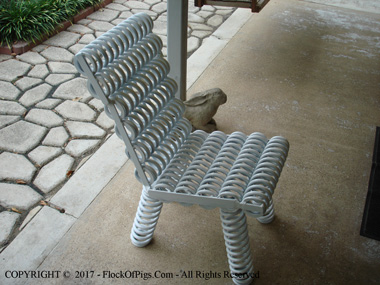
This patio chair is 33" tall, 14.5" wide and weighs about 110 lbs. It was made from (15) rear suspension springs which came off of a number of Kawasaki Mules (4 wheel mini trucks). The original springs were replaced with heavier duty springs and the original springs were discarded (lucky for me).
Tree Stump Table
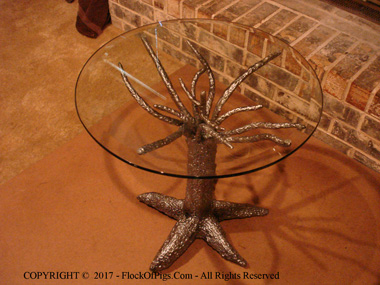
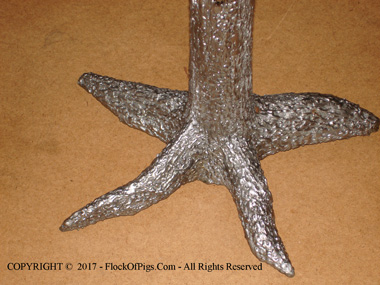
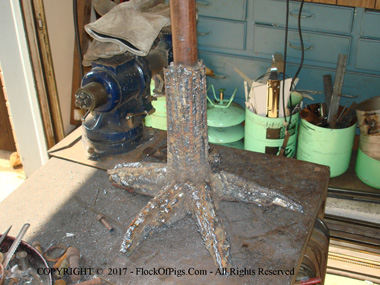
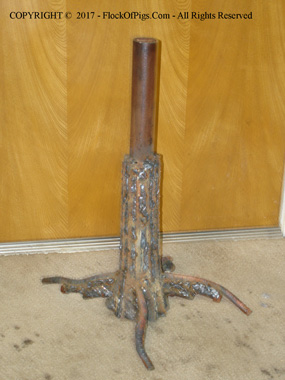
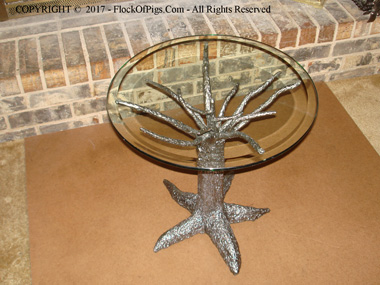
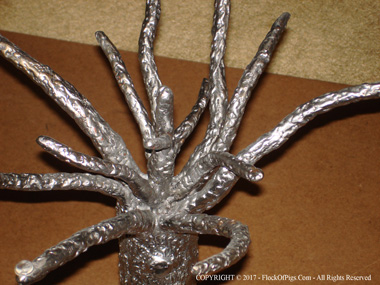
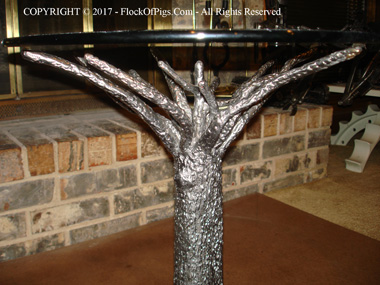
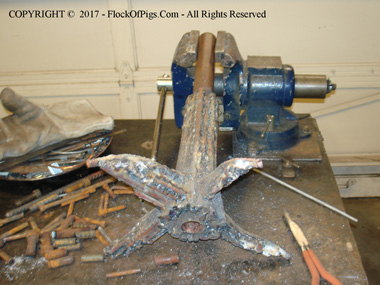
Table is 21" tall, glass top is 20" across. Table weighs about 44 lbs, top weighs 12 lbs. Table legs have small 1/2" long spikes at each tip to penatrate carpet and pad and rest directly on concrete floor (prevents table from leaving deep impression on carpet and keeps table from wobbling on carpet and pad).
Man-Cave Coffee Table
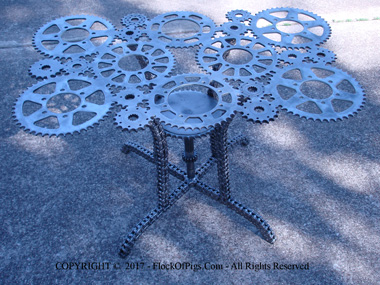
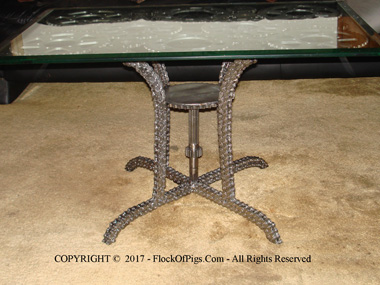
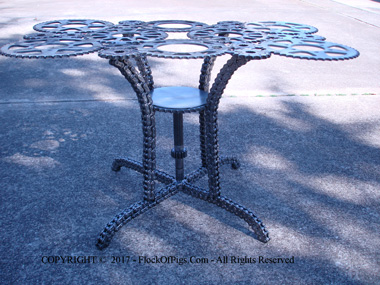
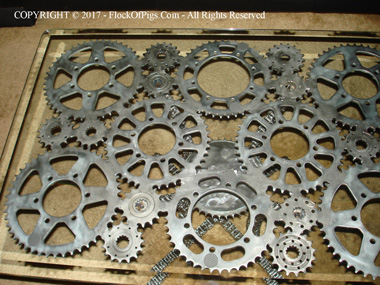
Coffee table made from motorcycle sprockets and motorcycle chain. Table is 22" wide, 34" long and 20" tall. Table weighs approximately 45 lbs (not including glass top). Glass top is 24" x 36" allowing for 1" overlap on all sides.
Structural Hour-Glass Table
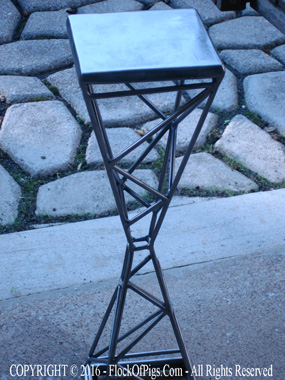
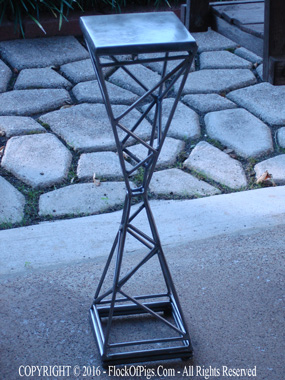
Drink table made from 1/4" steel rod welded in structural hour-glass form, 23" tall with 6"x 6" top, 23" tall, weight 6 lbs.
Motorcycle Parts Table
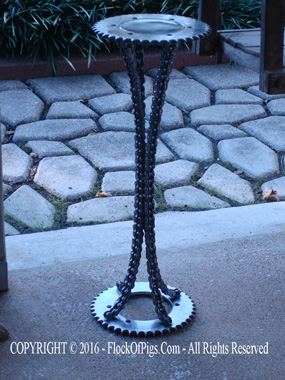
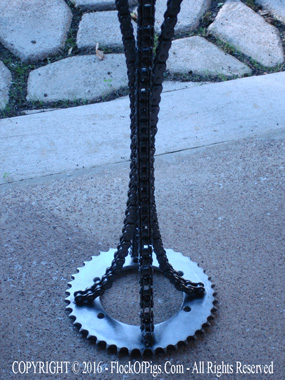
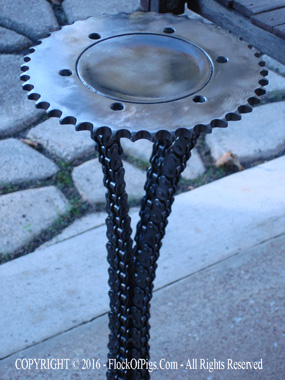
Drink table made from motorcycle sprockets and chain, 24" tall with 8" top, weight is 9 lbs.
Lattice Column Table
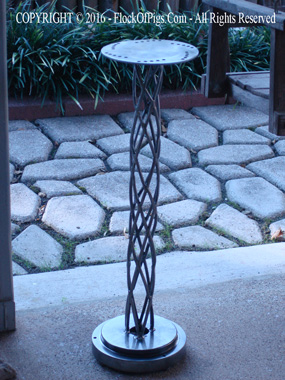
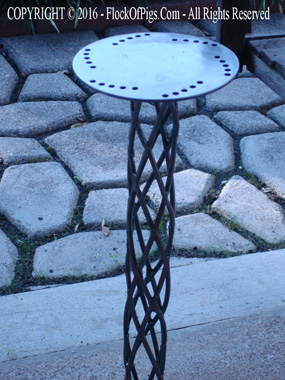
Drink table made from 1/4" steel rod wound into lattice column form, 25" tall with 6" diameter motorcycle disk brake top, weight is 10 lbs.
Drink Table Quarter Twist
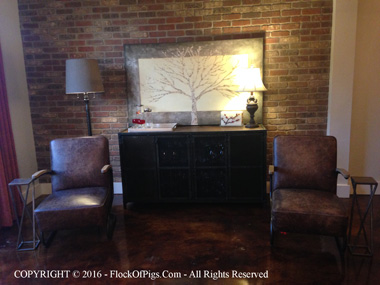
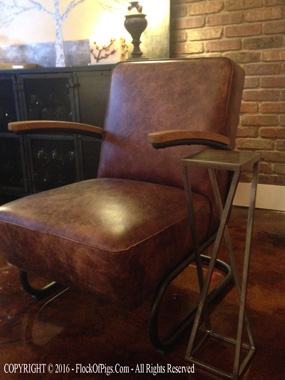
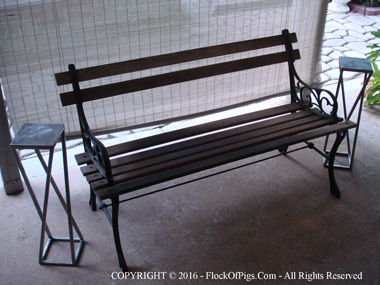
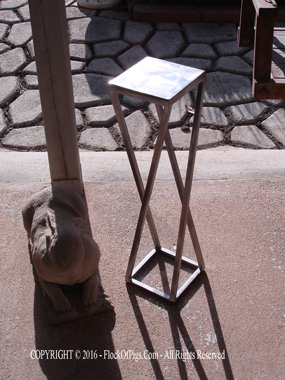
These 6"x6" drink tables stand 23" tall and weigh about 8 lbs each. The tops have a 1/4 twist in reference to the base. 1/2" square tube steel was used for the top and legs and 1/2" solid square steel was used for the base for added stability.
Drink Table Half Twist
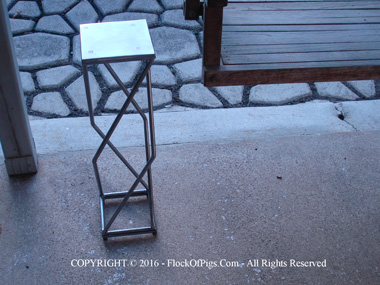
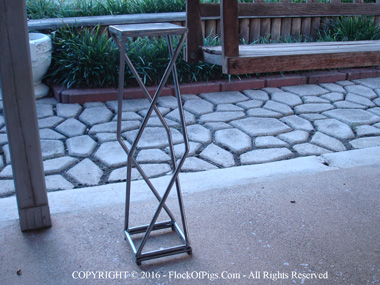
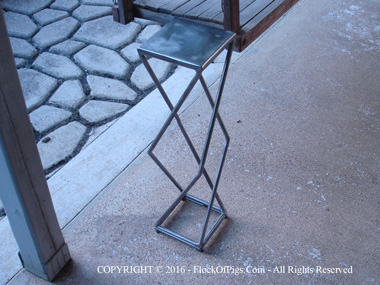
This 6"x6" drink table stands 23" tall and weighs about 8 lbs. The top has a 1/2 twist in reference to the base. 3/8" solid round steel was used for the top, legs and base.
Drink Table Structural Pedestal
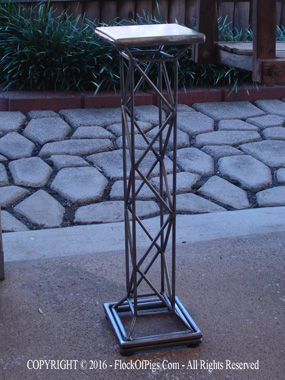
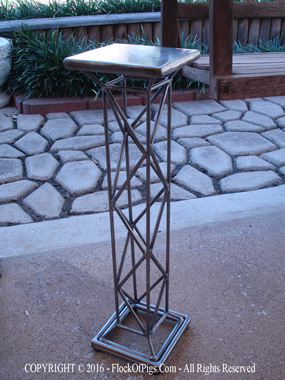
This 6"x6" drink table stands 23" tall and weighs about 8 lbs. 3/8" solid steel rod was used for the top and base. 1/4" steel rod was used for the structural center pedestal.
Pedestal Table
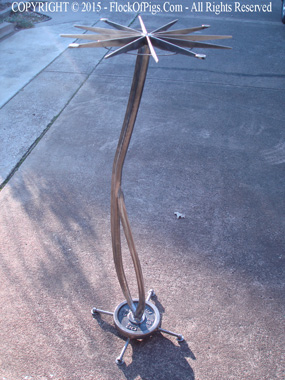
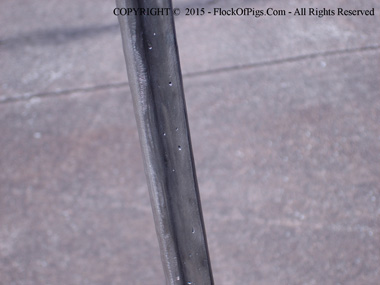
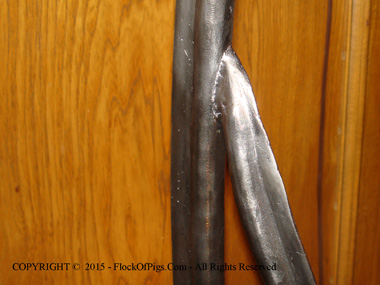
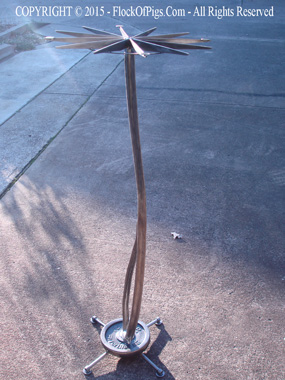
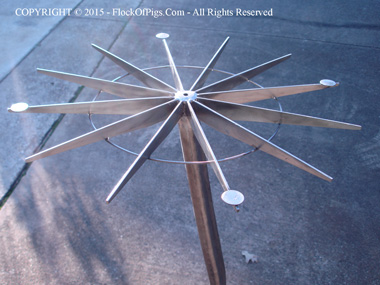
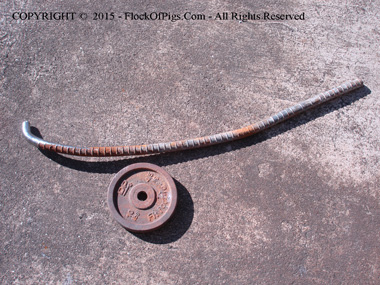
The beginnings ...
This pedestal table stands 45" tall and weighs 30 lbs (without glass top). It is designed for a 1/2" thick by 29" diameter tempered glass table top. It was created from 3/4" rebar salvaged from a demolished bridge, an old weight from a bar bell set, as well as other salvaged materials. I welded 2 pieces of 1/4" rod (one on top of the other) to the back side of the 3/4" rebar and then ground them down to create a wedge or fin detail.
Recycled Table
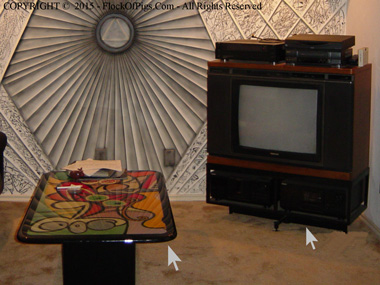
Original table and TV stand
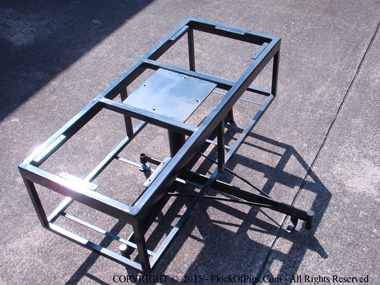
Original TV stand with swivel base
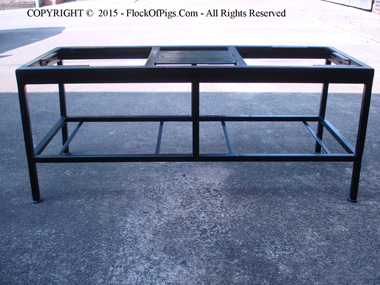
New table base with added legs
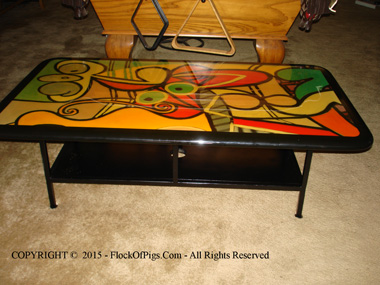
Updated table with new base
My son needed a coffee table for his new apartment. I created this one using parts from a TV stand that I had created several years ago and a saved table top, both of which I had stored but were no longer using. I removed the swivel base from the TV stand, added short legs to the bottom and attached the table top. It's a better looking table than the original which only had a simple box type base.
Curved Pedestal
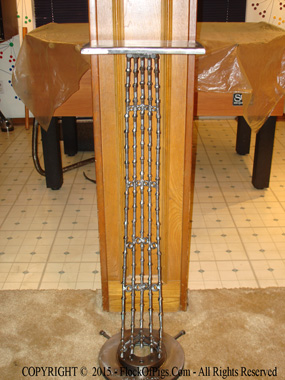
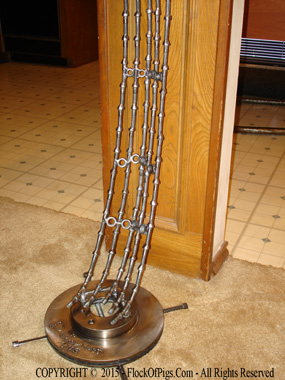
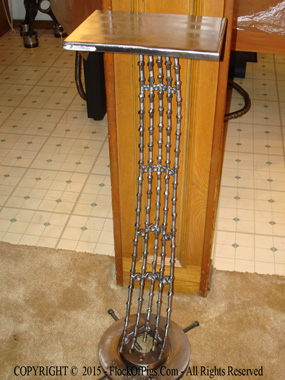
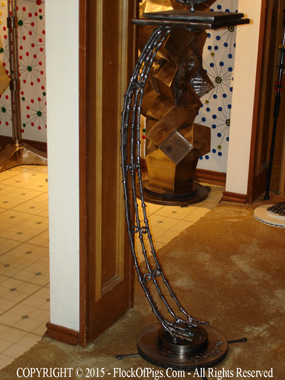
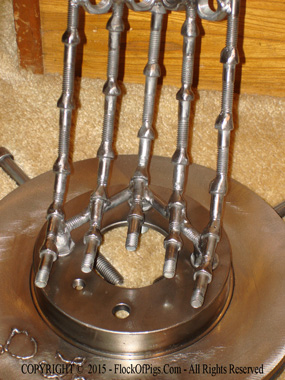
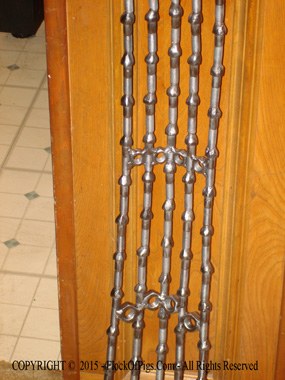
This art pedestal is 40" tall and was created using a small brake rotor, nuts, bolts and discarded shipping brackets.
Micro/Convection Oven Stand
The old stand
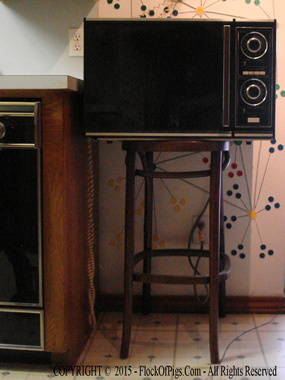
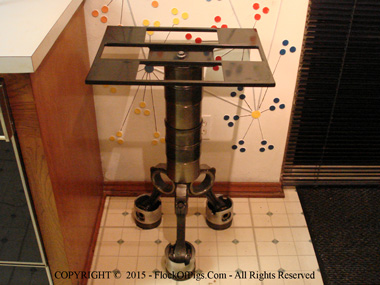
The new stand
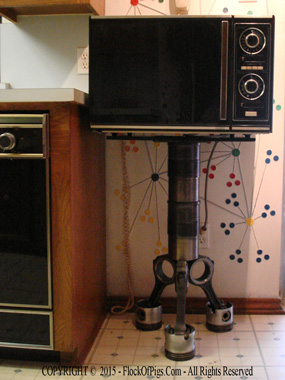
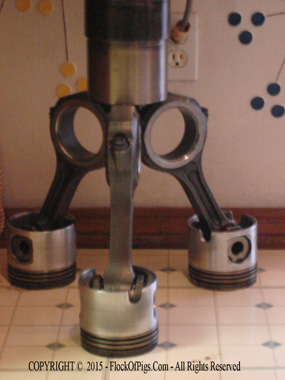
This is a replacement stand for my old (but still works great) micro/convection oven. The 3 pistons and connecting rods came from a catapillar diesel engine. Each piston and connecting rod weighs around 18 lbs. I used 2 of the piston sleeve inserts for the center column. I topped it off with a simple 1/2" square tube frame with metal plates for the feet of the oven to rest on. The piston connecting rods are welded together with a large nut in the center. The pistons, the (2) sleeves and the top are all held together with a single custom made 20" long bolt.
Multimedia Stand
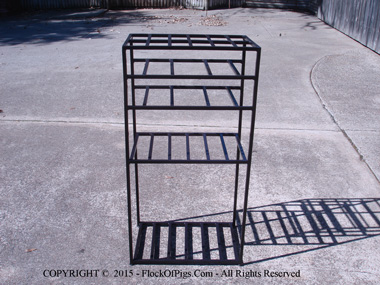
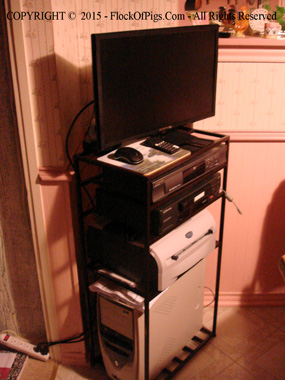
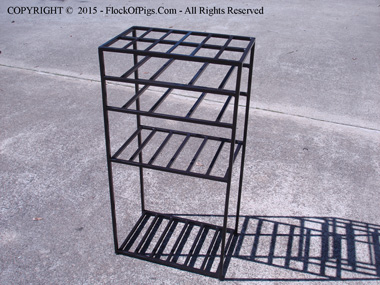
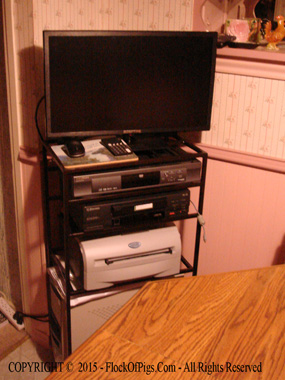
My elderly mother, who still lives by her self, spends most of her time sitting at her kitchen table (eating, going though mail, etc.). Her computer and printer were in a front office and as such were rarely used. I designed and built this stand as part of a 85th Birthday gift so that she can have all her media in one place and use it in the room where she spends the majority of her time. It holds her new 24" LCD tv/monitor, DVD player, VCR, laser printer, computer and her new wireless mouse and keyboard. This allows her to watch TV, DVDs, VHS tapes, computer slide shows of all her old photos (which I scanned for her several years ago), watch computer digitized home movies and use her computer for letter writing, all while sitting at her kitchen table. The stand is 36" tall, 18" wide and 12" deep. The shelves were designed to allow plenty of ventilation for the electronic equipment.
TV and Gaming Stand
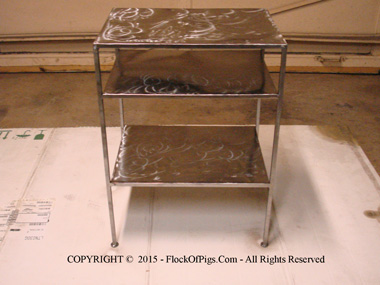
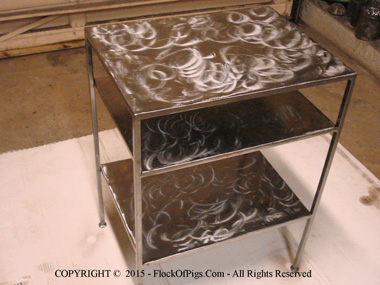
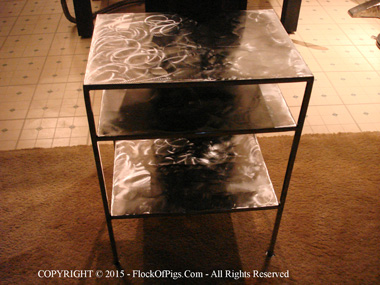
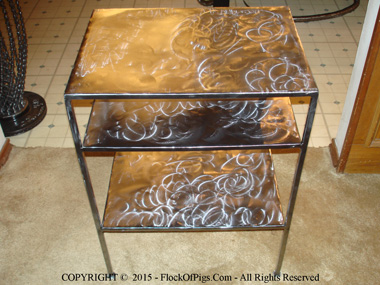
This TV stand is 26" tall, 20" wide, 15" deep and weighs 28 lbs. I built it as a Christmas gift for my son. It holds his wide screen tv and Xbox gaming station and has a storage shelf below for games and game controllers.
Piston Table
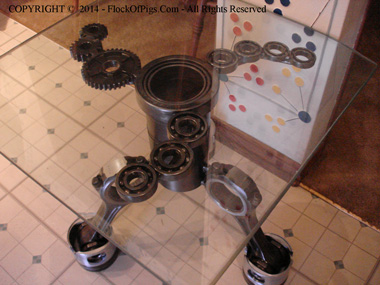
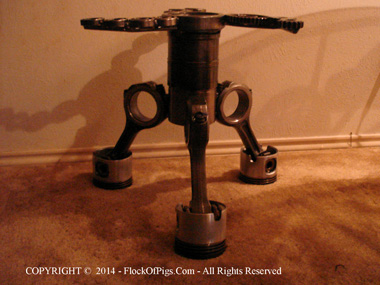
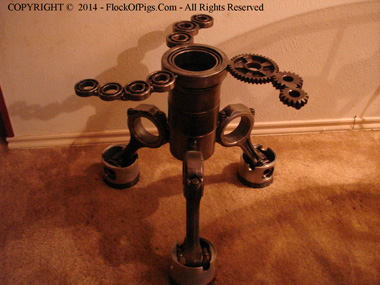
This table is 20" tall and weighs 62 lbs. Each of the legs (piston and connecting rod) weighs 14 lbs. The pistons and cylinder insert (center column) came from a 6 cylinder Catapillar engine. The bearings and gears came from Kawasaki Mules. At the time of the photos, I borrowed a square glass top from one of my other tables. This table will eventually have a 24" x 1/2" thick round tempered glass top.
Side Table
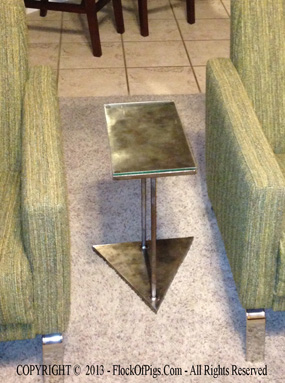
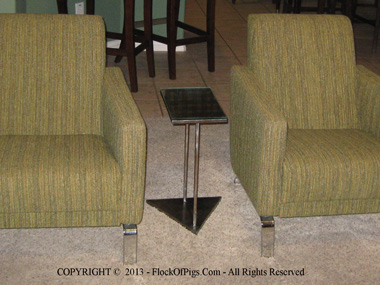
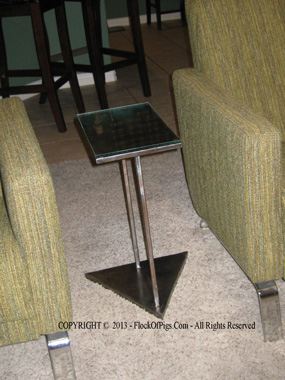
This is a small 8" x 14" x 20" side table that I made for a friend. The base is made from a 3/4" thick piece of plate steel. The top frame and legs are made using 1/2" square tube steel. The top is covered with thin sheet metal and topped off with 1/4" thick glass.
Beverage Stand
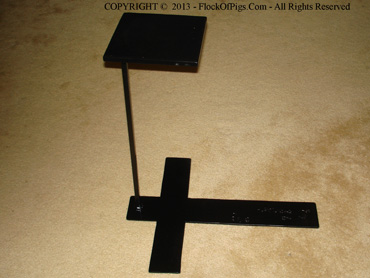
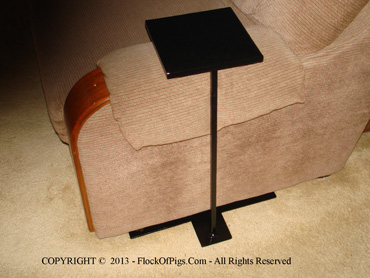
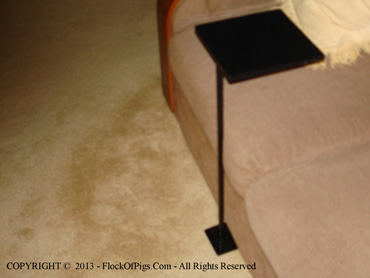
This is a small 8" x 8" beverage stand that I made for a friend. The base sits under the couch and the table can be used in front or on the side of the couch. The heavy base is made from 1/4" thick steel plate and thus only requires 1/4" clearence under the couch.
Bar Stools
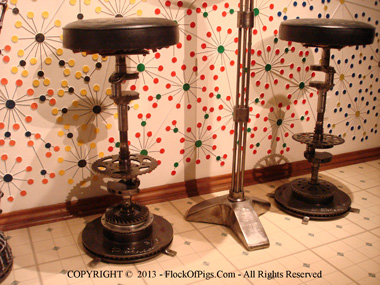
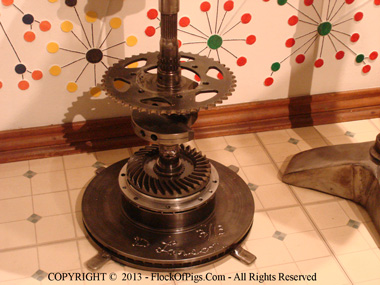
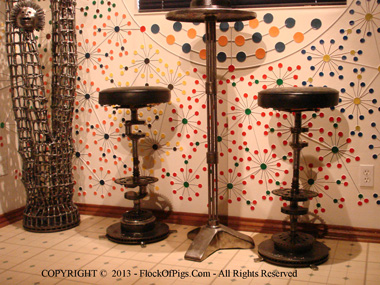
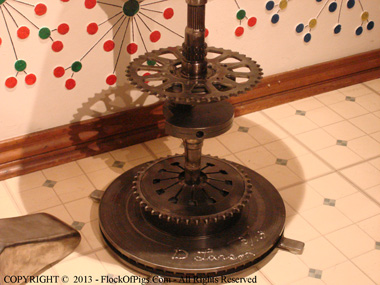
I had a pair of bar stools that I wanted to customize to match the table I had created earlier (see below). These bar stools stand 31" tall and weigh about 52 pounds each. I used a large brake rotor from a truck for the base on both. The bases are slightly different but otherwise the stools are identical in construction. I used 2 crank shafts (from Kawasaki Mules and ATVs) welded together for the pedestal and a motor cycle sprocket for the foot rest.
Bar Table
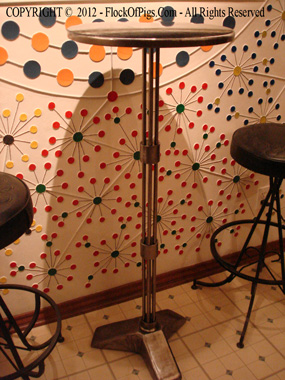
The table is 45" tall and weighs a heafty 63 pounds. I wanted a heavy base for stability and I got it with the 3 teeth (the base alone weighs about 37 pounds)
I already had bar stools for my foosball room but no table. I created this table using scrap metal salvaged from several sources. The table is made up of 3 seperate pieces (base, pedestal and top). The base was made from 3 replaceable teeth from a large backhoe bucket which I got from a friend who works at a demolition company. The pedestal has 6 steel rods arranged in a circle with a longer 7th rod running down the center. The rods were salvaged from motorcycle shipping brackets which I cut up into usable lengths using a plasma cutter. Since the salvaged rods were only 15" in length I made 3 sections using the rods and then welded the 3 sections together to form the full length pedestal. The center rod was the only full length rod and is welded at the top of the pedestal and extends several inches past the bottom with a length of bolt thread welded on the end. The threaded end is bolted to the base (from the underside) using a nylon lock nut, thus placing the pedestal in a state of compression. The table top was created from a rusty piece of 1/4" thick diamond plate that I had laying around. Because I wanted a smooth table top, I used the backside of the diamond plate for the table top.
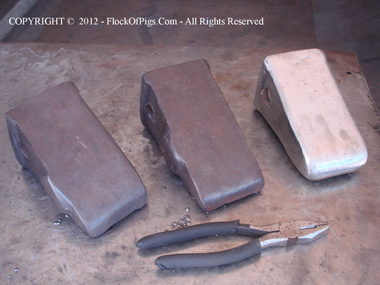
Raw backhoe bucket teeth.
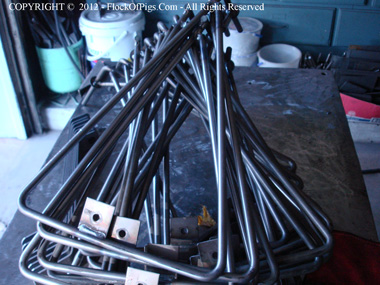
Raw motorcycle shipping brackets.
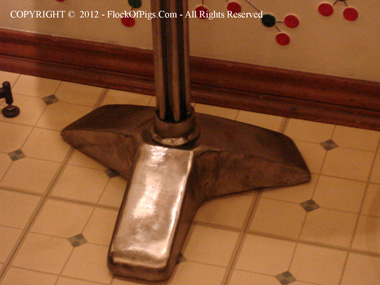
Teeth welded together to form base.
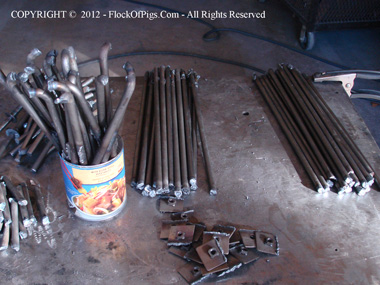
Brackets cut into usable pieces.
Space Saving Multi-Level Display Stand
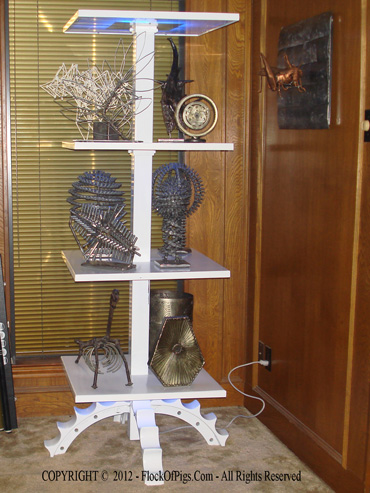
Photo taken with flash
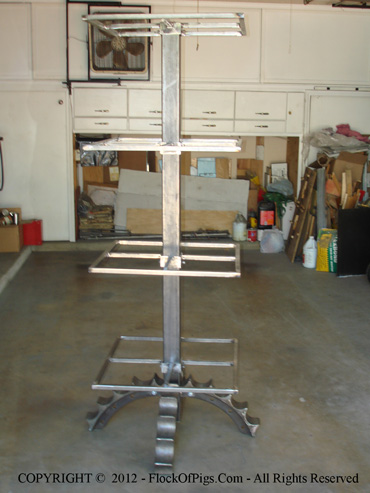
Basic frame structure for stand.
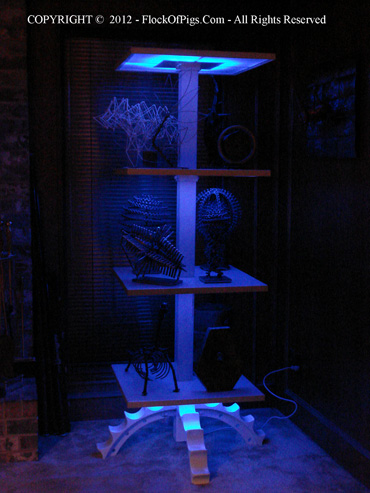
Photo taken without flash (stand lighting only)
I was running out of room to display new art pieces so I created this compact display stand. I used the same bulldozer gear pieces for the legs that I used for the dining table created earlier. The 2'x2' panel frames were created using 3/4" square tubing which was then covered with 16 gage sheet metal. There are (12) LED's in each panel and a small on/off rocker switch on the underside of the 2nd from bottom panel. Each panel assembly weighs about 20 lbs, the center pole around 10 lbs and the legs about 90 lbs for a total weight of around 180 lbs. I used 1/8" plexiglass (frosted using spray window frosting) on the underside of each panel to eliminate glare. The entire stand uses about 4 watts of power which is provided by a small 12 volt regulated power supply housed in the bottom of the center pole. The legs and panels are bolted in place and can be removed from the center pole if needed. Even though this was a very challenging piece to build, I was very happy with the outcome.
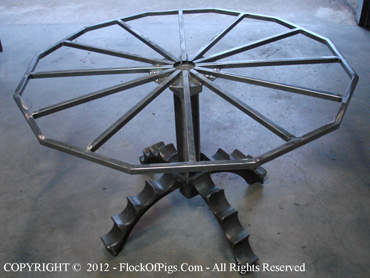
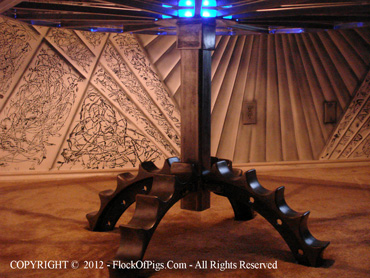
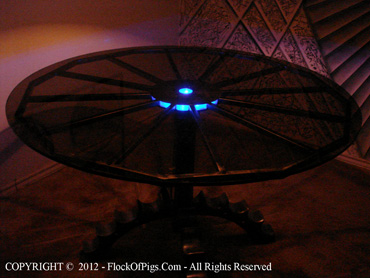
48" Lighted Dining Table (feet are from a catapillar bulldozer)
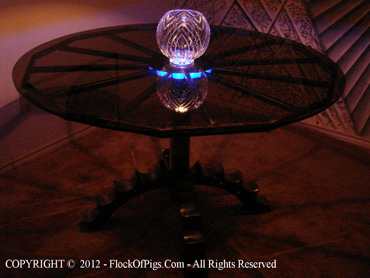
Cut glass bowl on table with dimmed overhead lighting.
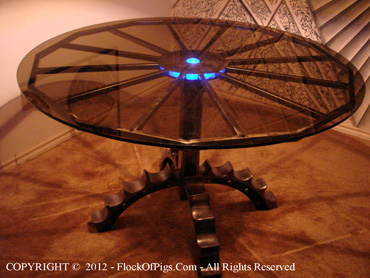
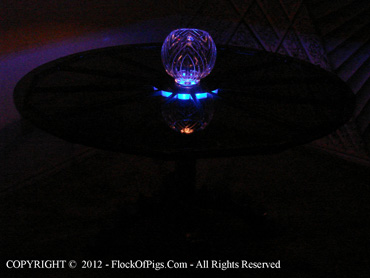
Cut glass bowl on table with only the table lighting.
This unique dining table consists of 7 seperate pieces (table top, center post, (4) feet and lighting cover plate). It has LED lighting incorporated into the design. The top was created using reclaimed 3/4" square tubing. The table center post is 3"x3"x0.25" square tubing. The feet of the table are actually 4 of the 8 pieces of the drive gear on one side of a bulldozer (the drive gear turns the metal treads on the bulldozer). Each one of the 'feet' weighs over 21 pounds. The feet and center post have a combined weight of about 100 pounds and the table top adds another 25 pounds (not including the glass).
The top has a short collar that fits over the top of the post and (2) bolts that tighten and hold it in place. The 'feet' each have a single bolt with nylon lock nut that holds them in place which allows for quick and easy breakdown and moving. There is a tiny rocker switch imbedded in the underside of one of the table top spokes near the table edge that turns the lights on/off. The (12) LED lights are powered by a small 12V DC power supply and the small power cord is run under the carpet to the wall.
The 48"x3/8" smoked glass top sits on top of the metal spoke top. There are 12 tiny rubber O-rings between the metal and glass top to prevent the glass from sliding around and getting scratched.
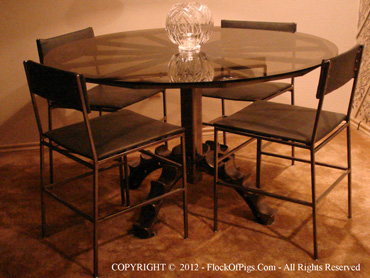
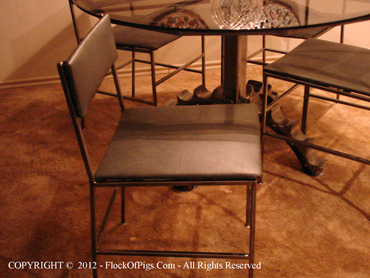
Table with finished chairs.
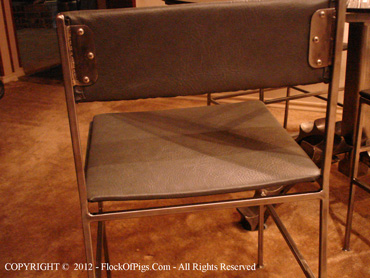
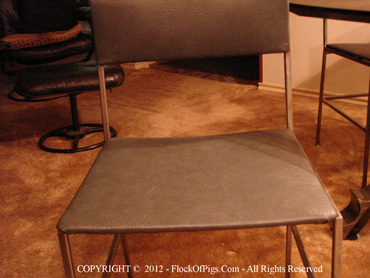
Chairs with curved seat and back.
The four chairs are made using about 70 feet of reclaimed 1/2" square tubing. Washers were welded to the bottom of each leg to make feet for attaching pads. The backs and seats are scrap 3/8" plywood I had lying around. They were both given a curved shape by soaking them in water, screwing the wet plywood to a curved wooden form and dried for 24 hours. The vinyl and padding for the seats and backs was purchased at a local upholstery shop.
Sculpture Display Stand
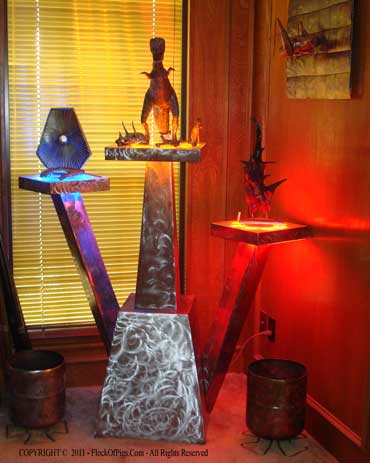
Middle platform is 15 x 15 inches, side platforms are 11 x 11 inches.
This display stand was designed specifically to display sculptures, but I also wanted it to be an art work in itself. It's unique design includes lighted display platforms. The (8) super bright (3mm) LED lights in each platform are positioned to shine light up on the sculptures and also shine light down on the stand itself. Each platform has a different color of LED lights. The lighted display platforms are bolted to the extension arms which in turn are bolted to the main base. A removable 50 pound balast weight (made from (10) 5 pound window weights) is bolted inside the bottom of the base to ensure a low center of gravity and maximum stability. A main on/off switch as well as seperate dimmer controls for each platform are located on the under side of the larger center platform. Center platform is 47" high.
The base and arms have rebar frames with extensive internal bracing designed to transfer any weight loads all the way to the very bottom of the base. The base and arms are covered with recycled sheet metal from pc cases. As you can see from the photos to the right, I ended up changing the design of the center arm. The design change was due to the fact that I didn't have single pieces of pc sheet metal large enough to do the job and joining 2 pieces left a seam that looked bad. The adjoining edges of sheet metal were welded then ground to a clean sharp edge. Both side arms have a tapered diamond shaped structure and an intentional slight twist to them.
The display platforms are a sandwich of 1/2" glass, 1/2" square support tube (with interlaced lights) and Plexiglass underside. 2" flat steel was welded to the outside edge of the metal platform frame to hide the glass and frame. I used a spray-on glass frosting on the inside face of both glass and Plexiglass surfaces. This was to hide the internal structure, the wiring and dispurse the light from the LED's.
I used a recycled external 18v DC power supply from an old printer to power the entire stand. The power supply is mounted inside the base so only a simple power cord is visible from the outside.
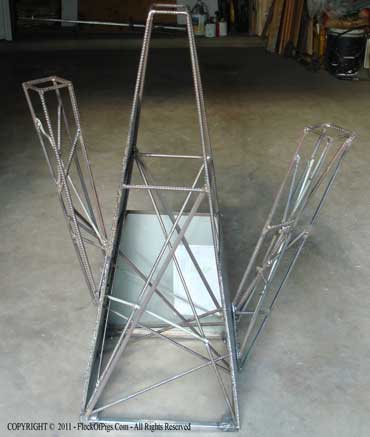
Frame stucture (before center platform was redesigned).
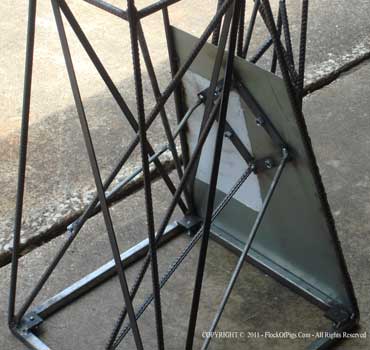
Mounting flange and bracing for (1) side arm.
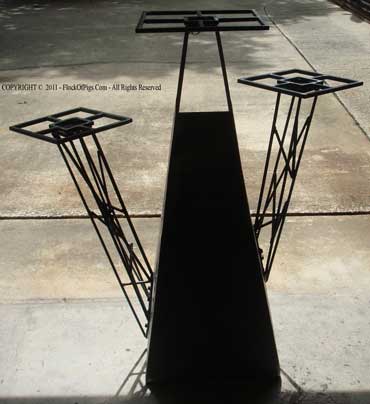
Shows basic platform structures.
The sheet metal finish was created using a 60 grit sanding disk on a grinder. Several coats of spray lacquer seal the metal and prevent rusting and dulling of the finish.
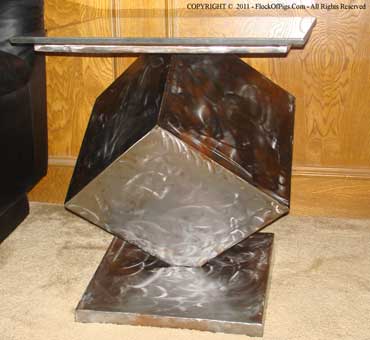
Cube - End Table
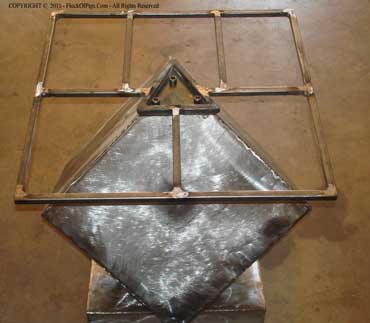
Top frame before being covered (top/bottom) with sheet metal.
This unique end table was created using reclaimed 1/2" square tubing (internal frame) and covered with recycled sheet metal from old pc cases. It consists of 3 separate parts (top, center cube and base) which are bolted together. It is suprisingly light weight but very stable and sturdy.
TV and Stereo Stand
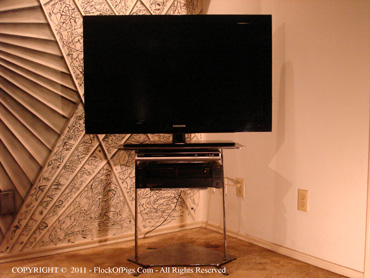
This TV and stereo stand was created using a 1/2"thick piece of scrap plate steel for the base and 1/8" steel plate for the top. The legs are 1/4" thick scrap steel. The two shelves were created using 1/2" square steel from recycled burglar bars. The shelves are not covered in order to provide better air flow above and below the componants that they support. I welded bolts to the bottom of the base for added stability because the carpet padding caused the stand to rock slightly. These wouldn't be necessary on a wood or tile floor.
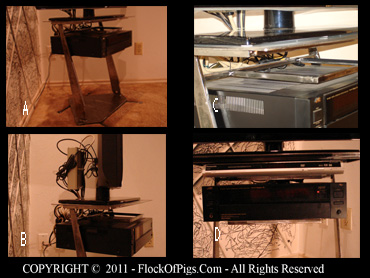
(Photo A) shows side view of stand. (Photo B) Shows surge protector/power strip mounted on rod and hidden from view behind TV to minimize viewing of wires. (Photo C) Shows a close up view of support for DVD player. (Photo D) shows clearence between componants and maximized air flow for cooling.
Octagonal Tree Bench
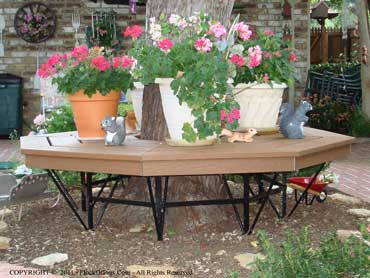
This octagonal tree bench was designed and built as a Mother's Day gift for my mom. It replaced a similar style wooden bench that was rotting away. My dad (now deceased) had made the orginal wooden bench for her some 15 years ago.
I designed the entire bench in detail using AutoCad software before starting construction. This gave me all the necessary angles and dimensions.
The steel frame was made from re-claimed 3/4" square tubing, rebar and 2" flat steel. The (8) seperate pie shaped sections of the simulated wood grain decking are made from recycled plastic (Trax, from Lowes) and are bolted to the steel frame. It should last her 20 years and only need minimal maintenance. The inner most pieces of the decking are bolted down from the top (counter sunk) so they can be easily removed and trimmed for clearance as the tree grows larger.
The small extensions on the legs (see photo below) are pieces of 1/2" burglar bars that fit inside the 3/4" leg post. These were drilled and bolted in place. The extensions sit in small holes which were filled with concrete after the bench was positioned and leveled.
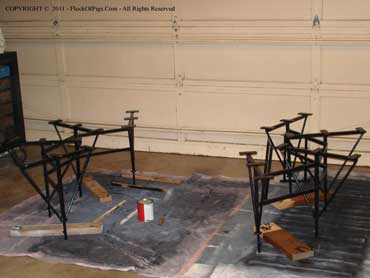
Two main sections (3 deck sections each) which are joined wih (2) bridging rectangles for the remaining (2) deck pieces.
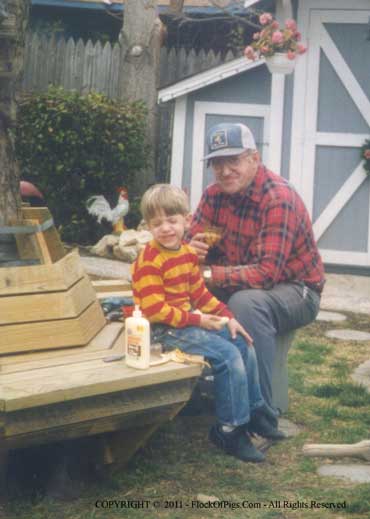
Original builder and his helper
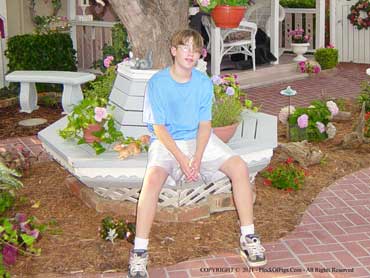
Original bench and helper
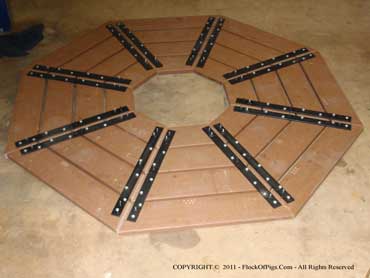
.25" x 1.25" flat steel was screwed to the underside of each deck section. The steel pieces have threaded studs welded to them which allow attachment to the metal frame.
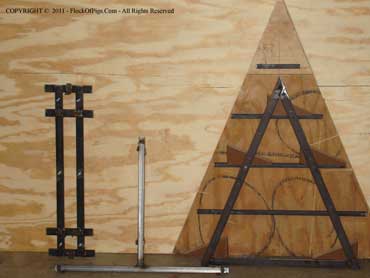
Various jigs for uniform hole drilling, frame welding, and deck section cutting and assembly. These were a must if all the pieces were to fit together at final assembly.
Squares - End Table
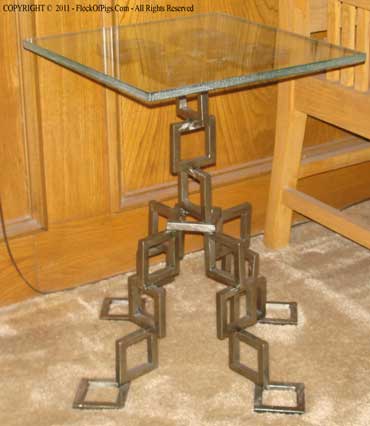
Table stands about 21 inches tall.
This little end table was created using 1/2 inch square solid iron bars which were recycled from discarded burglar bars. I ground the paint off all the long lengths of bar before cutting the small pieces (much easier). The upper-right photo shows the 100+ pieces which were cut using a 14 inch chop saw. The lower-right photo shows the pieces after being welded together to form the squares (square welds were also cleaned up).
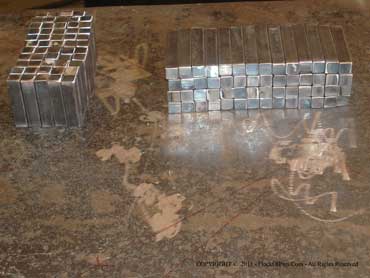
Pieces cut for squares (2 and 3 inches).
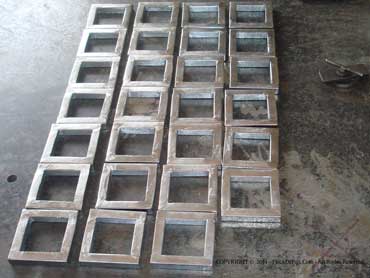
Completed 3 x 3 inch squares.
The photo to the left shows the final table after the squares were welded together and the joining welds were cleaned up using a Dremal tool. A coat of lacquer seals the surface and prevents rusting and dulling of the finish. The glass top (14 x 14 x 1/2 inches)was cut from salvaged glass shelving that had been discarded.